
Here is what you need:
- Avisynth
- Gspot
- HC018
- ffmpeggui03
- Gui for dvdauthor (borax (the author of this tool) helped me a lot on my actual DVD before I can write this guide, so please donate him if you can make use of my guide)
- A burning software that can burn a ‘Video_TS’ file (I’m using Nero Vision 7)
Steps’ summary:
Step 1: Get your files’ information
Step 2: Write a Avisynth script for the avi files
Step 3: Encode avi-->m2v using Hcgui in HC018 folder
Step 4: Extract the audio file (mp2) from your avi file
Step 5: Creating Main Menu
Step 6: Submenu for Subtile Selection
Step 7: Submenu for Chapters Seleciton
Step 8: Creating and Burning your DVD
Step 1: Get your files’information
Open Gspot then File-->Open-->Choose your avi file and record the frame rate down.(we are doing multiple avi files so do it twice or 3 times depending on how many avi file you want to add, in this case I’m doing 2 avi files)
Step 2: Write a Avisynth script
-Open Notepad (Start-->Program-->Accessories-->Notepad) to write and Avisynth script so we can open it in HC018 a.k.a HC_Encoder (HC018 is a software that can’t open an avi file directly)
-Copy this into your notepad:
Code: Select all
 DirectShowSource("C:\ Somemovies.avi", fps=25).LanczosResize(640,480)
AddBorders(40,16,40,16)
KillAudio()-Do the same thing with your second avi file, except that now you have to change the name.
-Explaination:
---"C:\ Somemovies.avi"<-- file your onw path to your files, don’t copy mine.
--- fps=25<--this also, don’t copy mine, this is what you just recorded (frame rate) from Gspot (step 1).
---LanczosResize<--this is command to resize the resolution (640 in width and 480 in height)
---AddBorders<this>m2v using Hcgui in HC018 folder
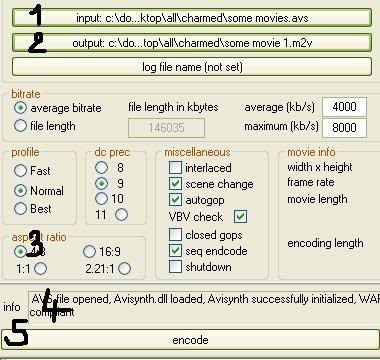
Open HCgui_018.exe in the HC018
1. Open your avs file
2. Choose the name for your out put file, to make it compatible and easy to remember, I choose the same name again (‘Some movie 1’)
3. I’m doing NTSC DVD so I choose 4:3
4. Ingore this error message because it’s just a warning (not important in this case)
5. Click Encode
6. Do the same thing with your second avs file (of course, have to change the output name)
[img]http://i48.photobucket.com/albums/f250/ ... /HC018.jpg[/img]
Step 4: Extract the audio file (mp2) from your avi file
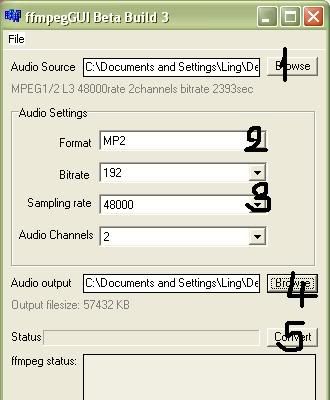
Open ffmpeggui
1. Browse your avi file
2. Choose MP2
3. Choose 48000
4. Choose the name of the output file
5. Click convert
6. Do the same thing with your second avi file
[img]http://i48.photobucket.com/albums/f250/ ... pegGUI.jpg[/img]
Step 5: Creating Main Menu
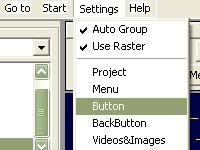
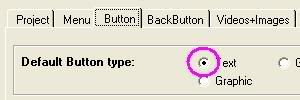
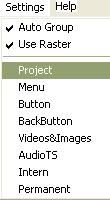
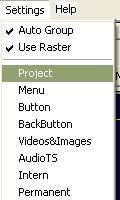
-Open Gui for dvdauthor.
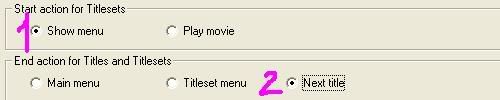
[img]http://i48.photobucket.com/albums/f250/ ... etting.jpg[/img]=========> [img]http://i48.photobucket.com/albums/f250/ ... tting1.jpg[/img]
Then
[img]http://i48.photobucket.com/albums/f250/ ... etting.jpg[/img]==========>[img]http://i48.photobucket.com/albums/f250/ ... tting1.jpg[/img]
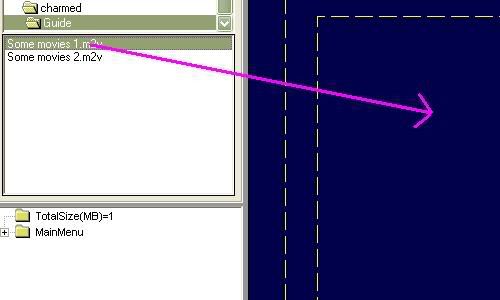
-Look for the folder that you stored the files you convert using HC_encoder a.k.a HC018 (step 3)
-Drag your first m2v to the right[img]http://i48.photobucket.com/albums/f250/ ... agging.jpg[/img]
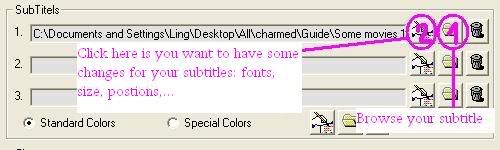
[img]http://i48.photobucket.com/albums/f250/ ... btitle.jpg[/img]
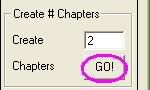
3. Dividing your video into chapter
[img]http://i48.photobucket.com/albums/f250/ ... erEdit.jpg[/img]
4. There are 3 ways you can divide your video but in this case, I use the 2nd option
After choosing your number of chapter (I’m creating 2 chapters), click Go.
[img]http://i48.photobucket.com/albums/f250/ ... rEdit1.jpg[/img]
-Do the same thing with your second m2v file.
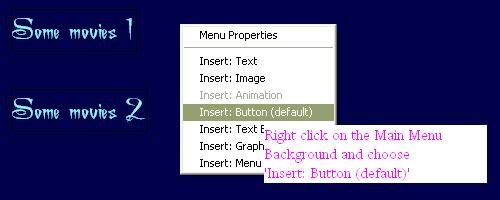
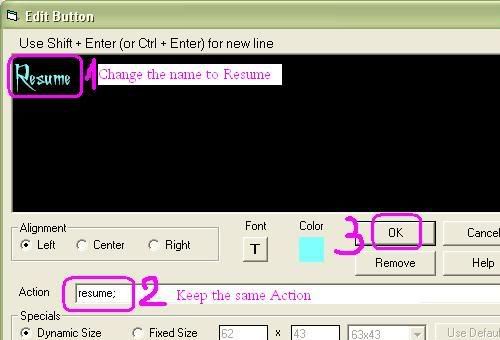
-Now, let’s create a ‘Resume’ button for your main menu
[img]http://i48.photobucket.com/albums/f250/ ... Button.jpg[/img]
[img]http://i48.photobucket.com/albums/f250/ ... utton2.jpg[/img]
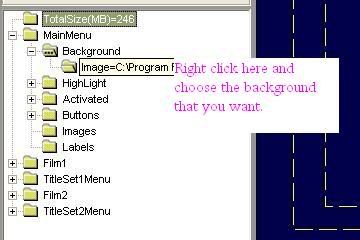
-Wanna change the Menu Background? Here is what you do:
[img]http://i48.photobucket.com/albums/f250/ ... ground.jpg[/img]
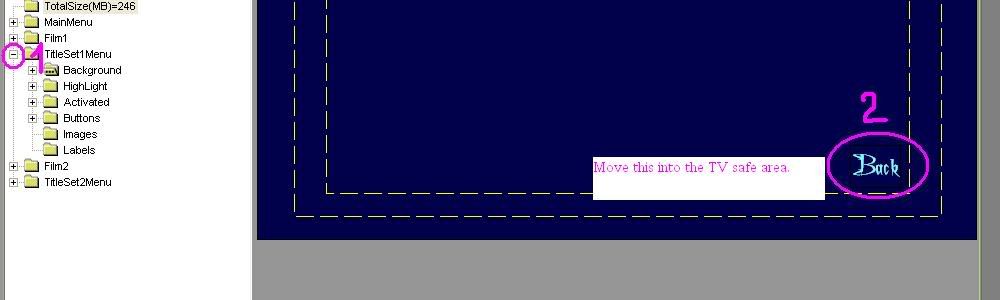
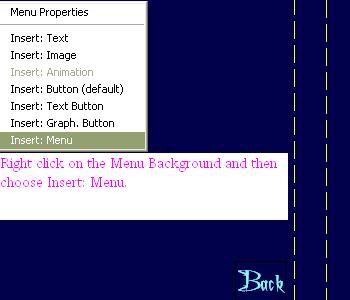
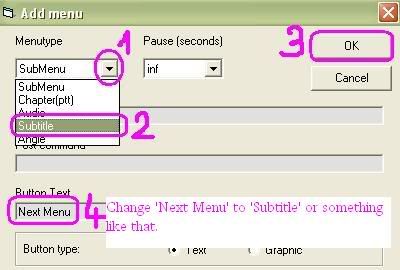
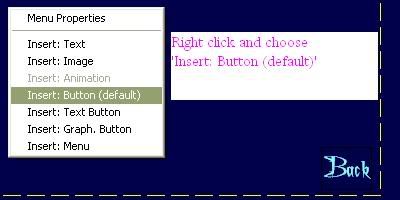
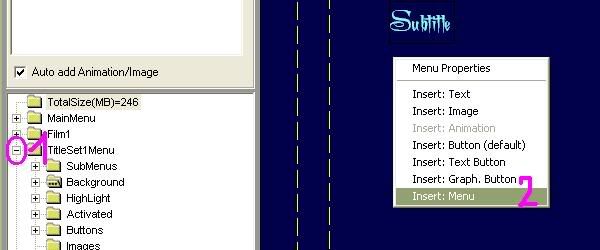
Step 6: Now, we’re gonna create submenu for the Subtitle
[img]http://i48.photobucket.com/albums/f250/ ... eSet-1.jpg[/img]
[img]http://i48.photobucket.com/albums/f250/ ... eSet-2.jpg[/img]
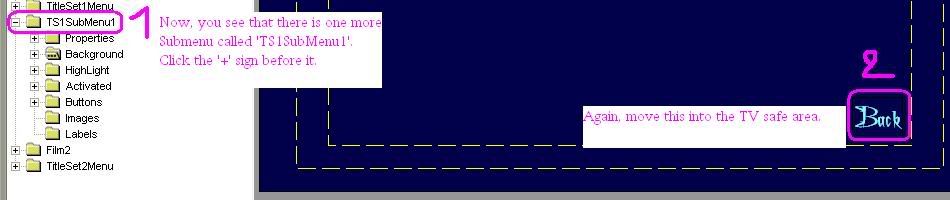
-Choose where you wanna to place your button and then click on it.
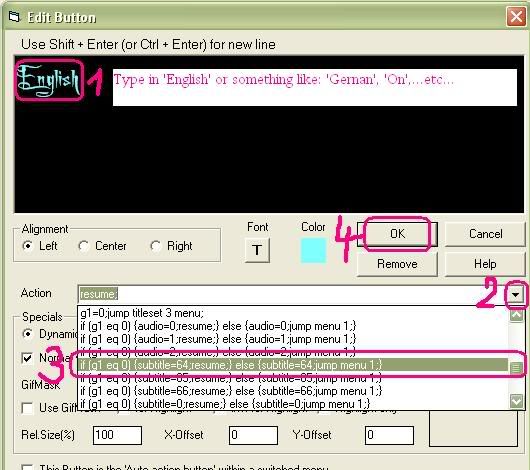
[img]http://i48.photobucket.com/albums/f250/ ... eSet-3.jpg[/img]
[img]http://i48.photobucket.com/albums/f250/ ... eSet-4.jpg[/img]
[img]http://i48.photobucket.com/albums/f250/ ... eSet-5.jpg[/img]
-Choose the postion you want and click on it.
[img]http://i48.photobucket.com/albums/f250/ ... eSet-6.jpg[/img]
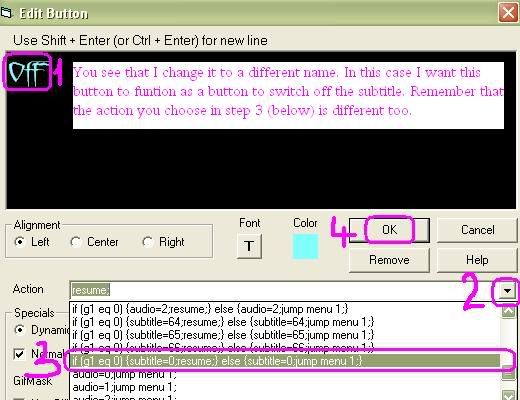
-Repeat everything in this step again to create another button but change the format of this button a bit different
[img]http://i48.photobucket.com/albums/f250/ ... eSet-7.jpg[/img]
-You are done with the Subtitle menu for the first video, do the same thing for your second video. (Open ‘TitleSet2Menu’-->Repeat everything in step 6)
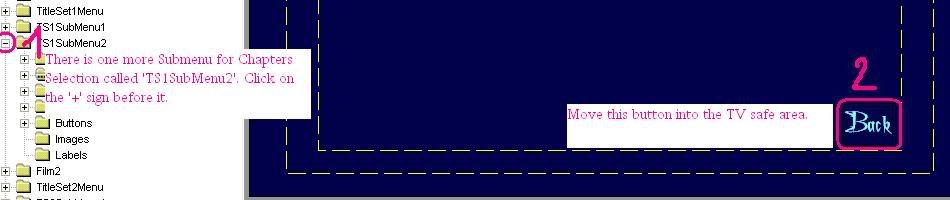
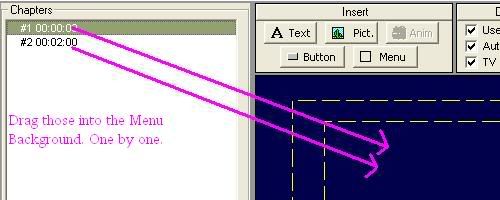
Step 7: This is time for creating Chapters menu
[img]http://i48.photobucket.com/albums/f250/ ... apter1.jpg[/img]
-Choose the postion you want and click on it.
[img]http://i48.photobucket.com/albums/f250/ ... apter2.jpg[/img]
[img]http://i48.photobucket.com/albums/f250/ ... apter3.jpg[/img]
[img]http://i48.photobucket.com/albums/f250/ ... apter4.jpg[/img]
-Chapters and chapters menu are all created for the first video. Open ‘TitleSet2Menu’ and repeat everthing in step 7 for your second video.
Step 8: Creating and Burning your DVD
-Finally, you can hit [img]http://i48.photobucket.com/albums/f250/ ... ateDVD.jpg[/img]to create the Video_TS for burning.
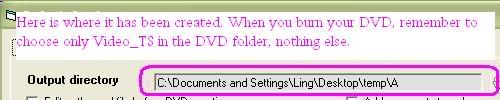
-After it’s done[img]http://i48.photobucket.com/albums/f250/ ... roject.jpg[/img]to find where your Video_TS has been created
[img]http://i48.photobucket.com/albums/f250/ ... ectory.jpg[/img]
Done! Hope you guys can make use of it. Plz forgive me if there are mistakes (this is my first guide ever
